After a lot of Googling and discovering lots of incomplete instructions and horrible 50 page essays-form how-tos with old dead links, I figured it out, it’s really freaking easy and once you get the right programs, only a couple steps…sheesh
UPDATE – now even easier – UPDATE
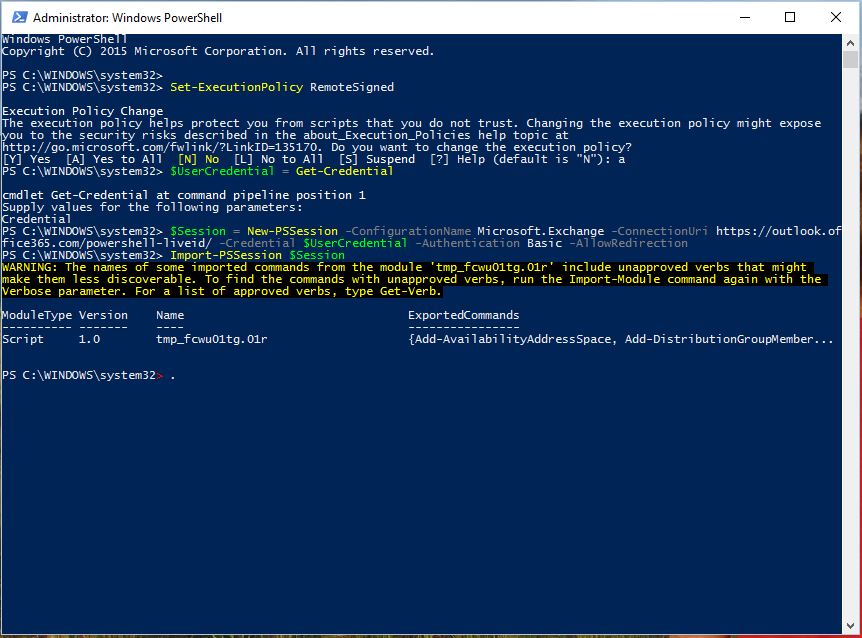
- Run powershell as administrator
- Run:
Set-ExecutionPolicy RemoteSigned
- Then run
$UserCredential = Get-Credential
- Type in your credentials in the pop-up, then run
$Session = New-PSSession -ConfigurationName Microsoft.Exchange -ConnectionUri https://outlook.office365.com/powershell-liveid/ -Credential $UserCredential -Authentication Basic -AllowRedirection
- And finally run
Import-PSSession $Session
And you’re there!
If you are reading this in the past – on, November 6th, 2014 – here is how to do it:
- Download the Microsoft Online Services Sign-In Assistant Wizard, install it and reboot
- Download the Windows Azure Active Directory Module for Windows PowerShell and install it
- Find the “Windows Azure Active Directory Module for Windows PowerShell” on your start menu (start menu search helps)
- In the shell, run:
$Session = New-PSSession -ConfigurationName Microsoft.Exchange -ConnectionUri https://outlook.office365.com/powershell-liveid/ -Credential $UserCredential -Authentication Basic -AllowRedirectiontype in your office365 administrator credentials in the popup and hit OK
- After the connection is made, run this:
Import-PSSession $Session
You only get 3 PowerShell connections so when you are done, make sure you run:
Remove-PSSession $Session
As a special bonus, I was trying to establish the connection to give everyone in the org reviewer access to everyone else’s calendar – sharing is caring – so if you need to do that, run:
 foreach($user in Get-Mailbox -RecipientTypeDetails UserMailbox) {
$cal = $user.alias+":\Calendar"
Set-MailboxFolderPermission -Identity $cal -User Default -AccessRights Reviewer
}


